


GIF images are fun, interactive images for engaging customers online. They got their fame in early 2010, and marketers believe GIF images increase engagement by 20%.
In other words, GIF‑enhanced content tends to attract over twice the audience interaction (likes, shares, comments) than the same content presented with a static image.
If you’re a marketer, a series of tools is required to achieve this, but for a designer, you can achieve this with just Photoshop.
In this post, we’ll show you how to make a GIF in Photoshop easily.
Get ready to make your clients say thank you!
How to Make a GIF Image in Photoshop.
-
Open Images via the Script Panel
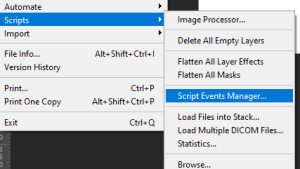
Go to File > Scripts > Load Files into Stack. This will load your images as separate layers in one document. Rename and order the layers as needed. -
Open the Timeline Window
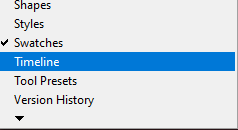
Navigate to Window > Timeline to activate the timeline panel. -
Select “Create Frame Animation”
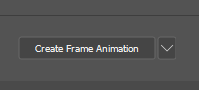
In the timeline panel, change the setting from “Create Video Timeline” to “Create Frame Animation.” -
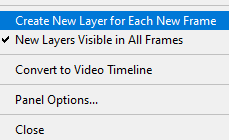
Create a New Layer for Each Frame
Go to Select > All Layers, then click the timeline menu icon and choose “Create New Layer for Each New Frame.” -
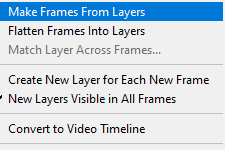
Make Frames from Layers
From the same menu icon, select “Make Frames from Layers” to turn each layer into a frame. -
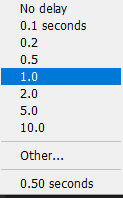
Adjust the Duration of Each Frame
Under each frame, set the duration (e.g., 1 second per frame) according to your desired animation speed. -
Set Playback Options
Choose how the GIF should loop—Once, Forever, or a custom number of times. -
Preview Your GIF
Press the Play icon in the timeline panel to preview your animation. -
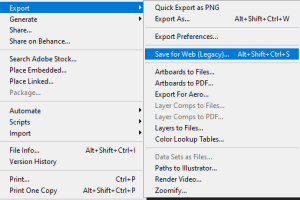
Export Your GIF
Go to File > Export > Save for Web (Legacy). Choose GIF format, adjust settings (like dither and size), and click Save to export your animation.
1. Open images via the script panel
To make a gif in Photoshop start with several images since a gif is a multiple of several images – You have to load several images into a single document. In Photoshop several images can be processed as a single document via the scripts panel to do this go to file >scripts>load files into stack. All images will now be loaded as separate layers, ensure you rename your layers and stack them according to how you intend to use them.
2 Open Windows timeline to make a gif in Photoshop
The windows timeline lets you set duration and even animations for each file. Open windows at the top of the navigation menu>Timeline
3 Click Create Frame Animation
The timeline window is set to video timeline by default so set it to frame animation since we are working with still images. Ensure you click on the frame animation otherwise you end up with a video timeline.
4 Create a new layer for each frame
Go to select>all layers. After doing this go to the drop down menu and select create new layer for each new frame
5 Make frame from layers
This will make each of your layer a frame of your gif. To do this go to the same menu icon and select make frames from layers
6 Adjust duration
Under each frame there is the option to select its duration. Set it to what fits your project. In this case we went with 1 second
7 Select playback
After your entire Gif has finished playing you can decide how you want your Gif to playback. There is the once option which means it repeats once and the forever option which lets it loop forever. Other will let you set a number of repetitions

8 Preview your GIF by pressing the play Icon
9 Export your GIF
Once you are satisfied with creating your gif in Photoshop it’s finally time to export your gif. Select export>save for web(legacy). There are various options to save your file as but keep things simple for yourself and stick with the GIF format know that the higher numbers on each format mean a higher file size and dither allows for more colors and details to come through in your GIF. When done with this hit save below, select a destination folder hit ok and your Gif is ready to go.
Make A Gif In Photoshop – The Best way
There are several Gif maker software available in the market like Giphy, ezgif, imgflip, etc but why restrict yourself to what they offer when you can give yourself an unrestricted experience by using the powerful Photoshop to make your own gifs.
Learning how to make a gif in Photoshop lets you explore powerful options such as neural filters, remove white backgrounds easily or swap faces all in your journey to make a gif in photoshop
GIFs have several uses and in certain contexts like online advertisement could be more engaging than videos or text. So start using them and spice up your content.