Krita Tips Every Designer Should Know
Hey there, fellow designer! Krita, that amazing free and open-source painting program, has become a go-to for digital artists everywhere. Whether you’re a pro or just dipping your toes into digital art, mastering Krita can really level up your work and open up new creative paths. This guide is packed with crucial Krita tips that every designer should add to their toolkit to make their art shine.
Think of it like this: from setting up your workspace just right to nailing those advanced brush strokes, these insights are here to smooth out your creative flow. Use these practical Krita tips, and you’ll find yourself designing faster and with more accuracy, effortlessly bringing your artistic visions to life.
- Customize your workspace: Set up Krita to match your unique design flow.
- Master brushes and presets: Unlock Krita’s powerful brush engine for consistent styles.
- Leverage layers and blending modes: Work non-destructively for flexible design.
- Boost efficiency with shortcuts: Speed up your workflow with key Krita shortcuts.
- Explore advanced techniques: Use symmetry tools, painting assistants, and filter layers for complex projects.
- Get started as a beginner: Familiarize yourself with Krita’s interface and basic tools.
- Optimize Krita’s performance: Make Krita run faster by managing settings and resources.
What essential Krita tips do designers need for an efficient workflow?
For designers, essential Krita tips focus on smooth canvas navigation, customizing brushes, smart layer management, and using Krita’s unique features like painting assistants. Focusing on these areas creates a smoother workflow, gives you better artistic control, and helps you finish projects faster, making your design process enjoyable and productive. Integrating these Krita tips will transform your digital art experience.
Why is customizing your Krita workspace crucial for efficiency?
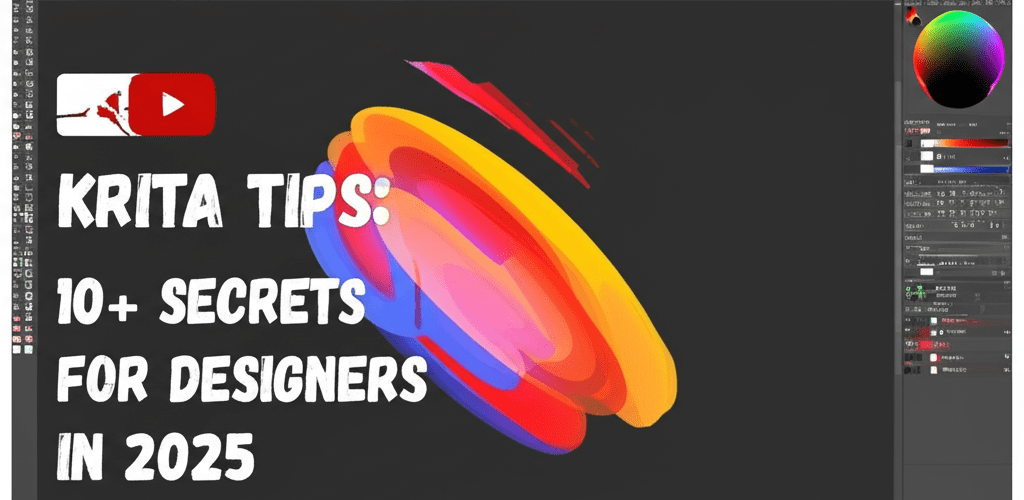
Customizing your Krita workspace is super important for boosting your efficiency. Krita is incredibly flexible, letting you arrange panels (called dockers) like Brush Presets, Layer Management, and Tool Options exactly where you want them. Drag and drop panels around, create layouts that suit different projects (like painting, comics, or animation), and save them! A tidy workspace means less clutter and quick access to your most-used tools, saving you precious time and generally making your Krita experience much smoother.
How can mastering Krita brushes and presets transform your digital artwork?
Mastering Krita brushes and presets truly transforms your digital artwork because Krita’s brush engine is incredibly versatile. It’s not just about the default brushes; dive into different types—pixel, vector, clone, deform, and filter brushes—and really get to know them. Play with settings like size, opacity, flow, and blending modes. Once you find a combo you love, save it as a new preset! This is one of those critical Krita tricks that will dramatically improve your artistic output, helping you achieve consistent styles and effects across all your projects. These effective Krita tips empower you to create with more freedom, like a seasoned pro handling their favorite drawing tools.
Why are Krita layers and blending modes essential for non-destructive design?
Krita layers and blending modes are absolutely essential for non-destructive design because they form the backbone of any digital painting. For smart design work, always create different layers for various elements: line art, flat colors, shading, highlights, and special effects. This way, you can tweak any part without messing up the others. Explore Krita’s wide range of blending modes to get cool visual effects, from a gentle glow to sharp contrast. Learning to group layers and use layer masks keeps your files neat and editable, giving you tons of flexibility throughout your design process. These layer-focused Krita tips are vital for any complex project.
How can Krita shortcuts and tricks boost your design efficiency?
Krita shortcuts and tricks can significantly boost your design efficiency because speed matters in design, and knowing your way around Krita’s keyboard shortcuts can save you hours on projects. It’s not just about saving clicks; it’s about staying in your creative flow and focusing on your art instead of fumbling with the interface. Applying these Krita tips will dramatically speed up your creative process.
Which Krita shortcuts and tricks are most useful for designers?
Here are some of the most useful Krita shortcuts and tricks for designers to enhance their workflow:
- Ctrl + T (Transform Layer): Quickly scale, rotate, or distort elements.
- Shift + S (Scale Layer): For quick scaling without distortion.
- M (Mirror View): Flip your canvas horizontally to easily spot compositional errors.
- Spacebar + Drag (Pan Canvas): Navigate your canvas effortlessly.
- Ctrl + Z / Ctrl + Shift + Z (Undo/Redo): Indispensable for corrections.
- Ctrl + Alt + Drag (Brush Size): Adjust brush size on the fly—a super handy one of the many Krita tips.
- Ctrl + Click (Pick Color): Sample colors directly from your canvas.
Beyond standard shortcuts, clever Krita tricks like using the ‘Pop-up Palette’ (right-click by default) give you instant access to brushes, colors, and other essential tools without digging through menus. If you’re just starting with Krita, building a strong foundation is key. Our Krita for Beginners guide can kickstart your journey with helpful introductory lessons and more practical Krita tips.
What advanced Krita techniques and hacks can elevate professional digital art?
Advanced Krita techniques and hacks can truly elevate your professional digital art once you’ve grasped the basics. Krita offers a wealth of sophisticated features that, when you understand and apply them, can push your digital creations to a professional standard. These techniques often involve combining multiple tools and grasping the subtle nuances of the program, making them powerful Krita tips for experienced artists.
How do Krita’s advanced features like symmetry and painting assistants enhance complex designs?
Krita’s advanced features like symmetry and painting assistants significantly enhance complex designs by providing powerful creative control. For example:
- Symmetry Tools: Krita’s symmetry tools (like vertical, horizontal, radial, or spiral) are fantastic. Use them for intricate patterns, character designs, or even complex mandala art. It’s an incredibly powerful feature for creating balanced and harmonious compositions with minimal effort—one of the top Krita hacks for precise designs.
- Painting Assistants & Guides: Don’t overlook the painting assistants. These let you draw perfect perspectives, ellipses, and vanishing points. They act as invisible rulers, ensuring accuracy in your architectural drawings or geometric designs, offering unique Krita tips for precision.
- Filter Layers and Masks: Apply effects like color adjustments, blurs, or sharpening non-destructively by using filter layers or masks. This means you can always go back and tweak them without altering your original pixel data—a crucial element among effective Krita hacks for professional artists.
- Vector Layers for Line Art: For crisp, scalable line art, definitely use Krita’s vector layers. Unlike pixel-based lines, vector lines can be scaled, reshaped, and edited infinitely without losing quality. This makes them perfect for comic art, logos, or graphic design elements that might need frequent adjustments, making this a vital one of the Krita tips for clean vector work.
- Resource Management: One often-overlooked Krita hack is efficient resource management. Regularly purge undo history (Settings > Configure Krita > General > Miscellaneous) and manage your brush presets. This keeps Krita running smoothly, especially on larger canvases or complex files. These simple Krita tips ensure optimal performance, much like managing processor resources for creative tasks.
Understanding Krita’s full capabilities also means knowing its place among other creative tools. If you’re curious how Krita compares to other digital art software, our insights on Krita Alternatives can be really informative, helping you pick the best tools for your specific needs and giving you more general Krita tips for various workflows.
How can beginners quickly learn Krita for digital art?
Beginners can quickly learn Krita for digital art by establishing a strong foundation with the right approach. While the initial learning curve might seem a bit steep, Krita is incredibly accessible and rewarding. This section will help you leverage the software’s potential from day one. These foundational Krita tips are crucial for new users.
What are the fundamental Krita steps for new digital artists?
Here are fundamental Krita steps to help new digital artists get started strong:
- Familiarize Yourself with the Interface: Take some time to explore all the menus, dockers, and toolbars. Don’t rush; understand what each section does. Krita’s interface is logical, and a little exploration goes a long way. This is a foundational one of the best Krita tips.
- Understand Basic Tools: Start with fundamental tools like the Brush tool (B), Eraser (E), Fill tool (F), and Selection tools (S, R). Practice drawing lines, shapes, and filling areas.
- Canvas and Navigation: Learn to create new canvases (Ctrl+N), adjust their size, and navigate using zoom (Ctrl + mouse wheel or +/-) and pan (Spacebar + drag). Efficient navigation is a key among Krita tips.
- Color Management: Experiment with the Color Selector docker. Understand HSY, RGB, and HSV color models. Practice mixing colors and creating palettes. For deeper insights into color, check out our articles on RGB color model and CMYK for print.
- Save Your Work Frequently: Krita files are typically saved as .kra. Make it a habit to save your work often (Ctrl+S) to prevent data loss. This is one of the most important Krita tips for any digital artist.
As you progress, you’ll naturally discover more advanced functionalities. Krita is powerful, but it doesn’t have to be overwhelming. Start small, practice consistently, and build your skills gradually. Many artists wonder how Krita stacks up against industry-standard tools. For a detailed comparison, especially if you’re weighing your options, our article on Krita vs. Photoshop can help you see which software best suits your artistic demands and give you more insights and Krita tips for your journey.
How do I optimize Krita’s performance and use it professionally?
Designers often ask how to get the most out of Krita, both in terms of speed and professional application. Here are common questions to help you improve your workflow with effective Krita tips.
- Q: How can I make Krita run faster?
- A: You can optimize Krita’s performance by adjusting canvas settings (think smaller size, lower DPI), purging undo history, managing active layers, and ensuring your graphics drivers are up to date. You can also fine-tune Krita’s memory usage in its settings. Applying these Krita tips can significantly boost your software’s speed.
- Q: Can Krita be used for professional design work?
- A: Absolutely! Many professionals use Krita for illustration, concept art, comics, and even some animation. Its robust feature set makes it suitable for a wide range of professional design tasks, especially when you apply these advanced Krita tips. To further grow your skills, consider these essential graphic design skills.
- Q: What are the best resources for learning Krita?
- A: Beyond this guide, Krita’s official documentation, vibrant community forums, YouTube tutorials, and dedicated online courses are excellent places to learn. Consistent practice and experimenting with the tools are also key to effectively mastering these valuable Krita tips.
Here are some more helpful articles to check out:
- Essential Krita Tips for New Users
- Exploring Krita Alternatives for Digital Art
- Krita vs. Photoshop: Which is Better for Your Workflow?
Authoritative External Resources:
- Krita Official Website: The primary source for downloads, news, and documentation.
- Krita on Wikipedia: A comprehensive overview of Krita’s history, features, and development.
- Digital Arts Online Krita Tutorials: A resource for various Krita tutorials and guides.
Wrapping Up Your Krita Journey
Getting really good with Krita is an ongoing adventure. By weaving these essential Krita tips into your daily creative flow, you’re not just getting better at the technical stuff; you’re also unlocking fresh creative possibilities. Think about it:
- Personalized Workspace: Tailoring Krita to your style makes a huge difference.
- Brush Mastery: Understanding Krita’s brush engine opens up endless artistic expression.
- Smart Layering: Using layers and blending modes keeps your projects flexible and organized.
- Shortcut Speed: Learning key Krita shortcuts saves time and keeps your creativity flowing.
- Advanced Techniques: Symmetry tools and painting assistants help you tackle complex designs with ease.
- Beginner Foundations: A solid start with the basics sets you up for long-term success.
- Performance Optimization: Keeping Krita running smoothly ensures you can focus on your art, not lag.
Keep exploring, keep experimenting, and let Krita be the dynamic canvas for your imagination. Embrace these powerful Krita tips, and watch your digital art truly shine!


